- Главная
- Разное
- Образование
- Спорт
- Естествознание
- Природоведение
- Религиоведение
- Французский язык
- Черчение
- Английский язык
- Астрономия
- Алгебра
- Биология
- География
- Геометрия
- Детские презентации
- Информатика
- История
- Литература
- Математика
- Музыка
- МХК
- Немецкий язык
- ОБЖ
- Обществознание
- Окружающий мир
- Педагогика
- Русский язык
- Технология
- Физика
- Философия
- Химия
- Шаблоны, фоны, картинки для презентаций
- Экология
- Экономика
Презентация, доклад к открытому бинарному занятию в рамках учебных дисциплин Иностранный язык и Технологии компьютерного 3D моделирования
Содержание
- 1. Презентация к открытому бинарному занятию в рамках учебных дисциплин Иностранный язык и Технологии компьютерного 3D моделирования
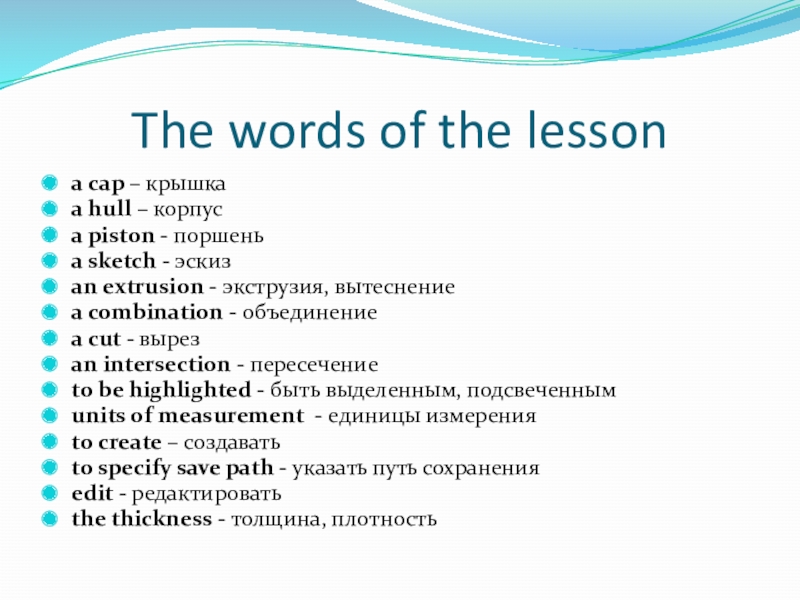
- 2. The words of the lessona cap a
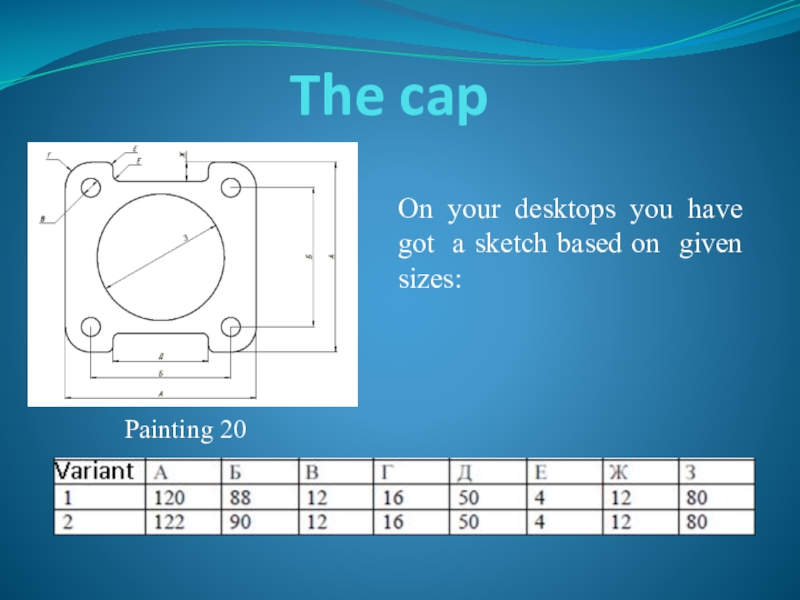
- 3. The capOn your desktops you have got a sketch based on given sizes:Painting 20
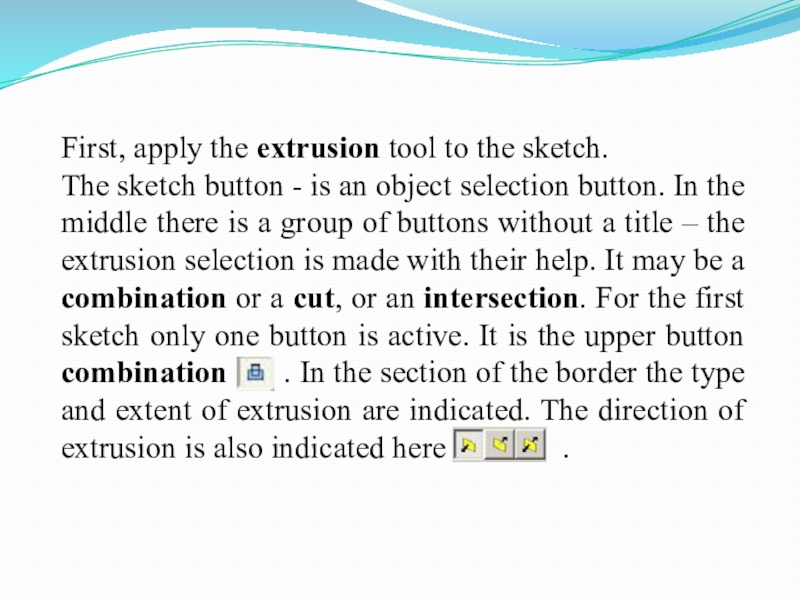
- 4. First, apply the extrusion tool to the
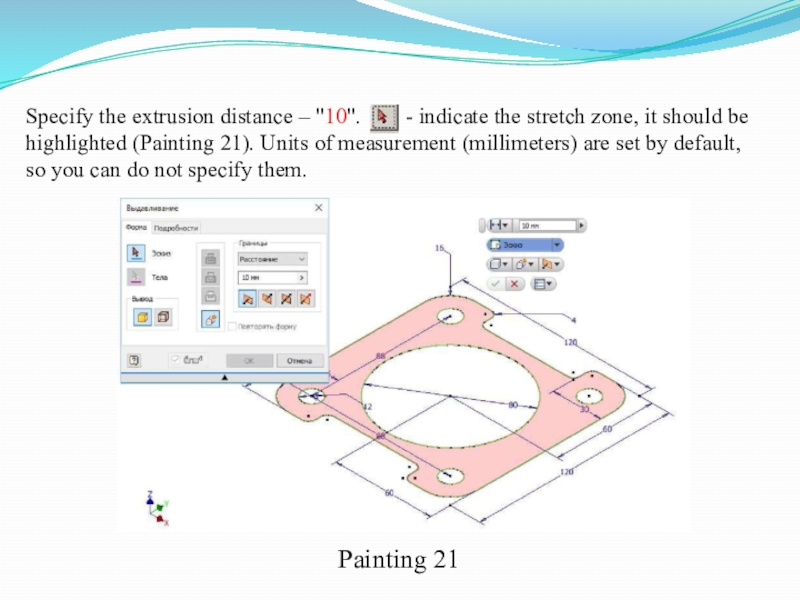
- 5. Specify the extrusion distance – "10".
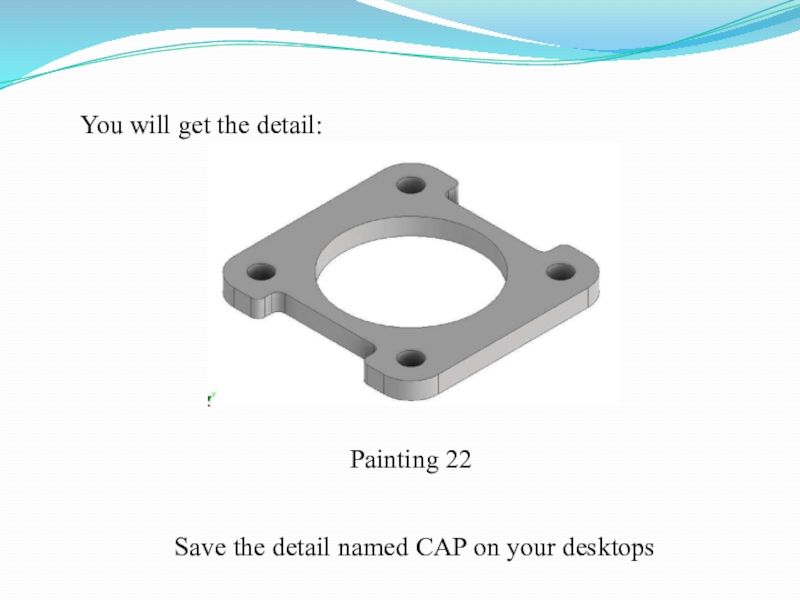
- 6. You will get the detail:Painting 22Save the detail named CAP on your desktops
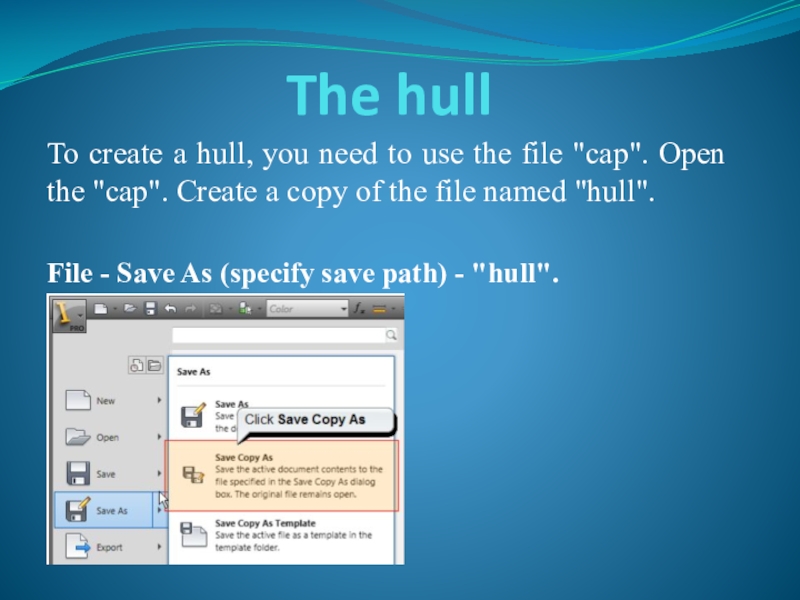
- 7. The hullTo create a hull, you need
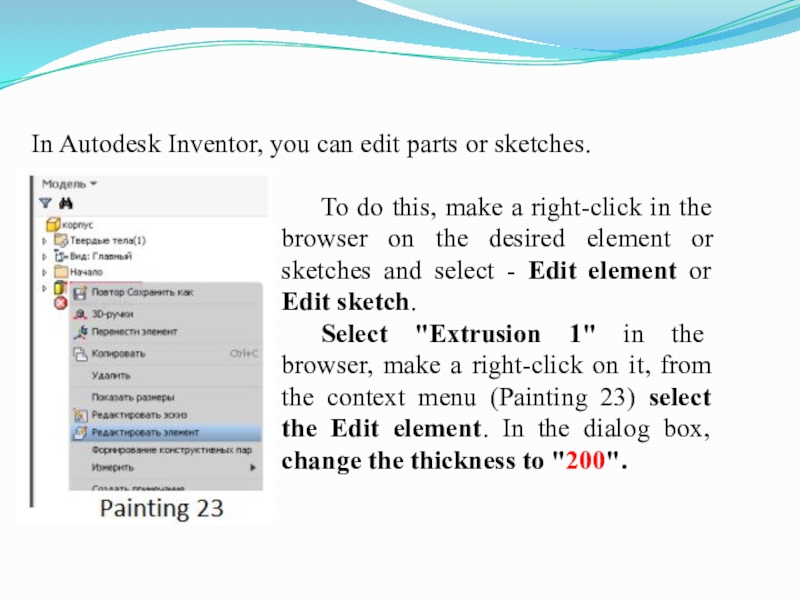
- 8. To do this, make a right-click in
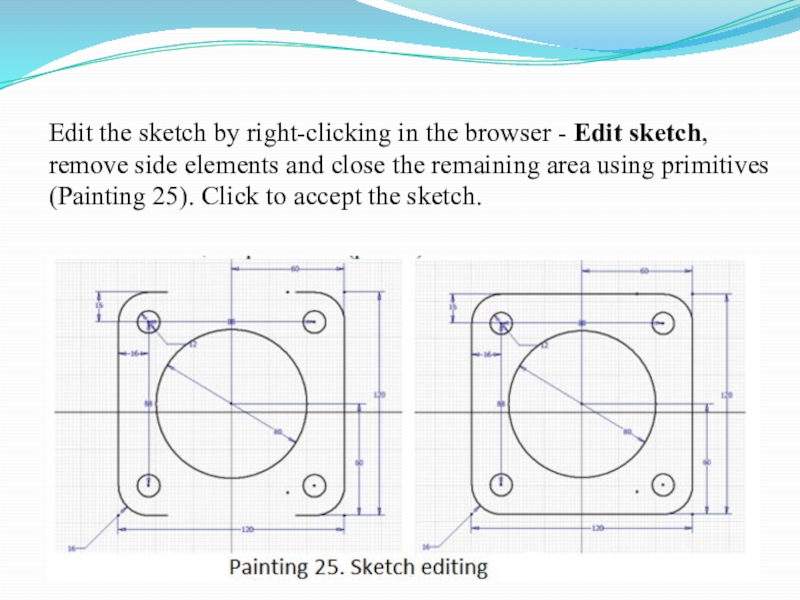
- 9. Edit the sketch by right-clicking in the
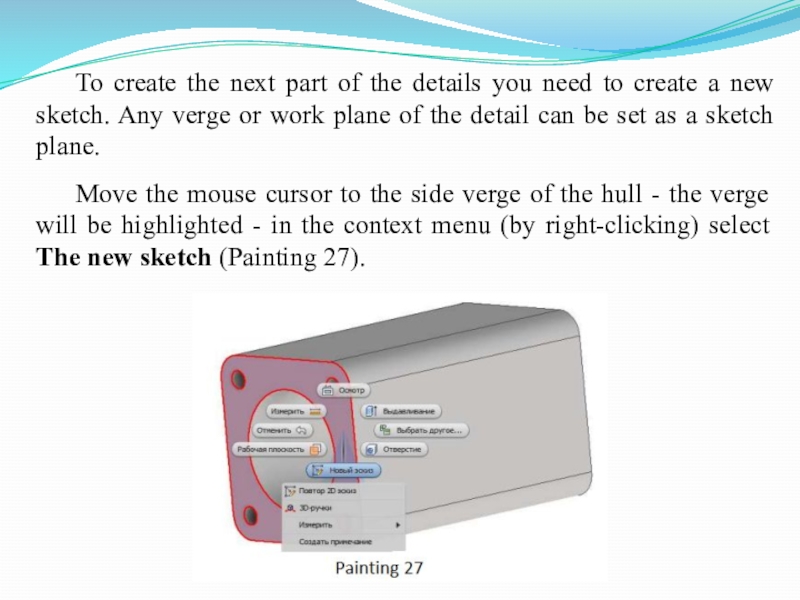
- 10. To create the next part of the
- 11. Then you need to create a new
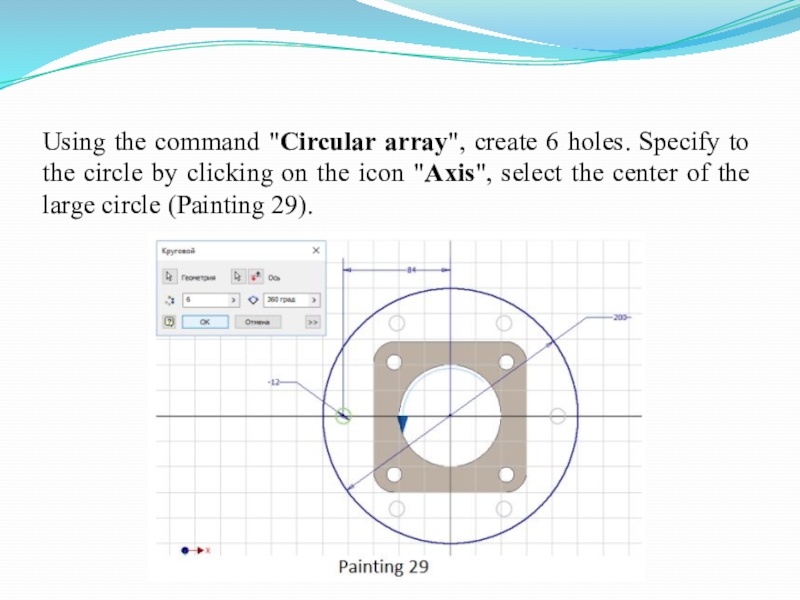
- 12. Using the command "Circular array", create 6
- 13. Squeeze on 20 mm and change the
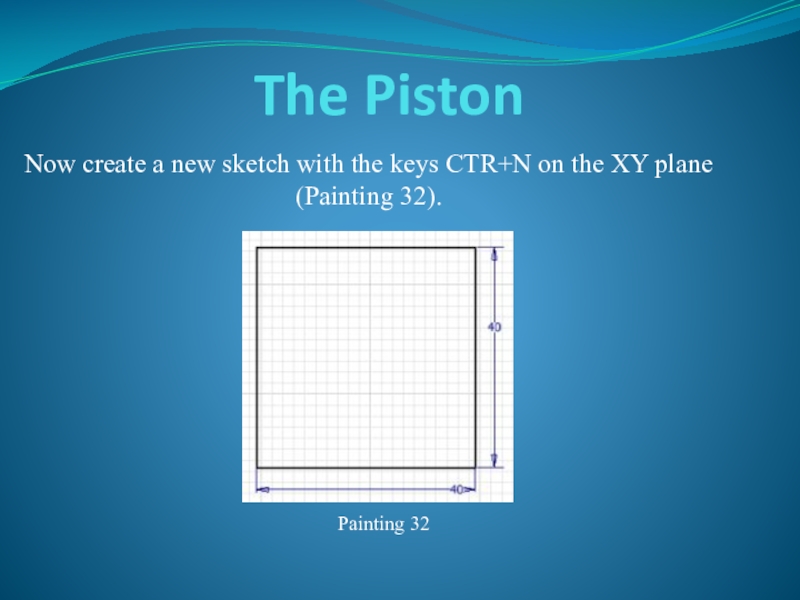
- 14. The PistonNow create a new sketch with
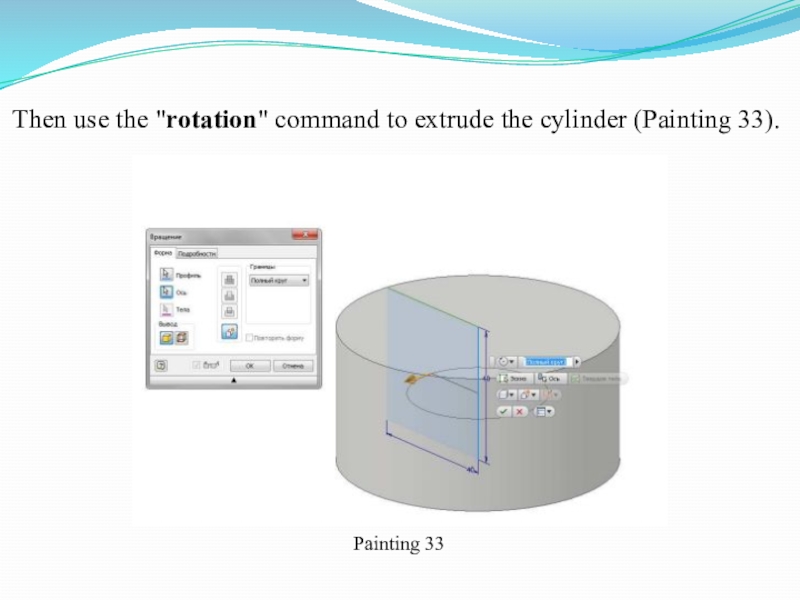
- 15. Then use the "rotation" command to extrude the cylinder (Painting 33). Painting 33
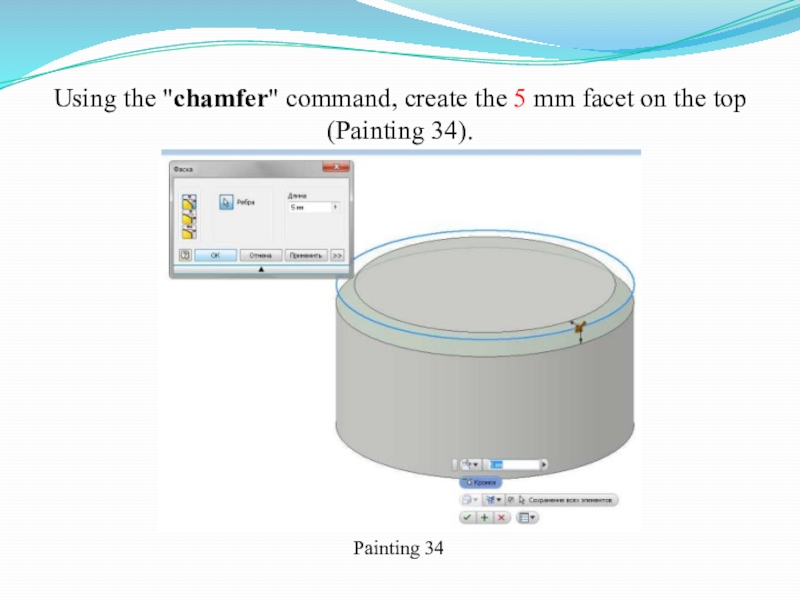
- 16. Using the "chamfer" command, create the 5 mm facet on the top (Painting 34). Painting 34
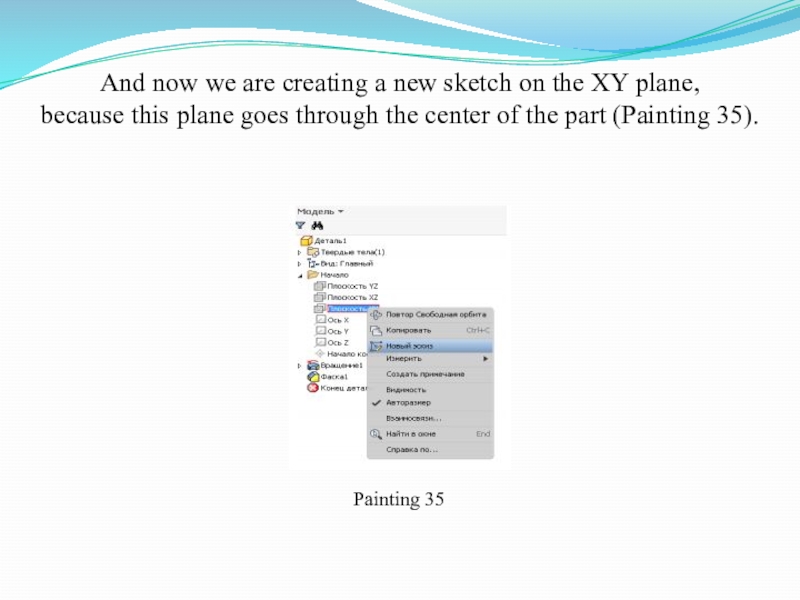
- 17. And now we are creating a new
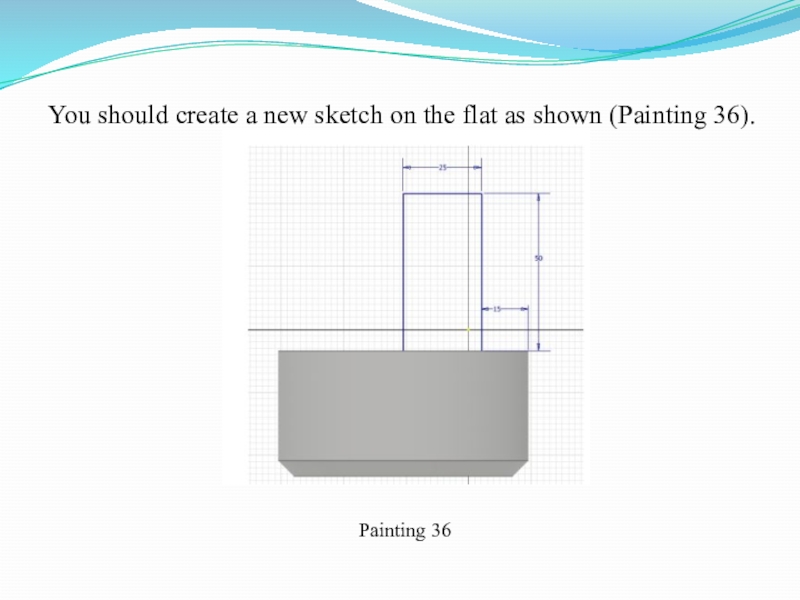
- 18. You should create a new sketch on the flat as shown (Painting 36). Painting 36
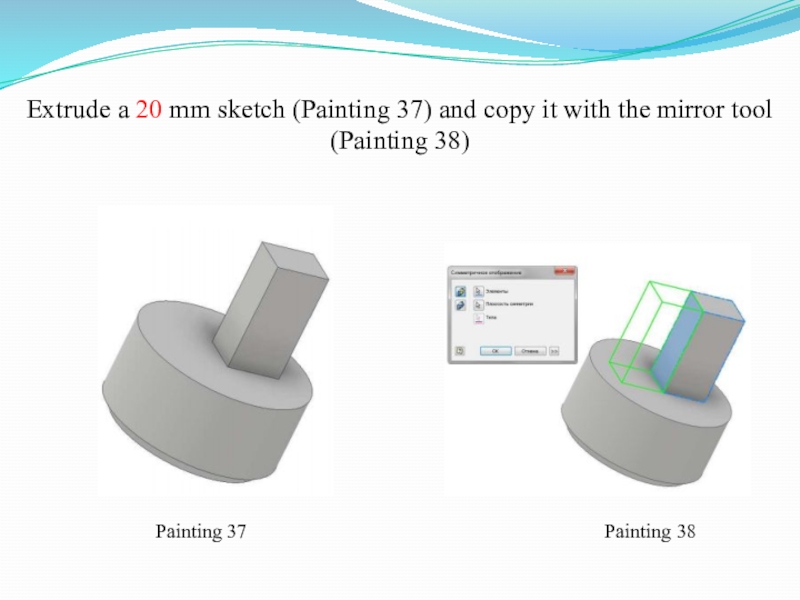
- 19. Extrude a 20 mm sketch (Painting 37)
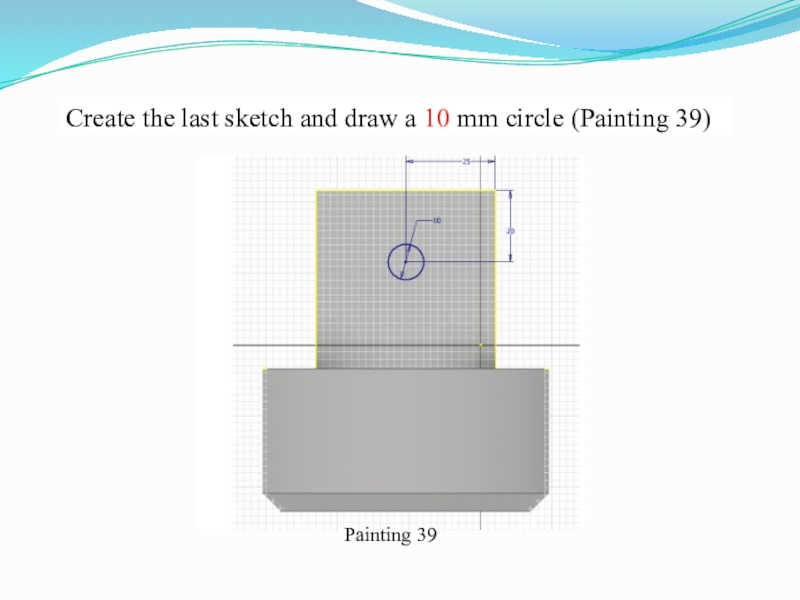
- 20. Create the last sketch and draw a 10 mm circle (Painting 39) Painting 39
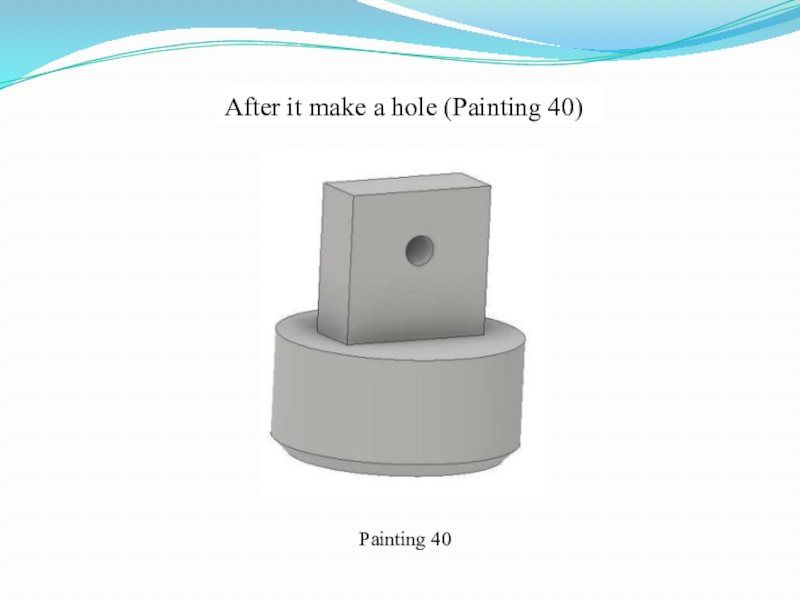
- 21. After it make a hole (Painting 40) Painting 40
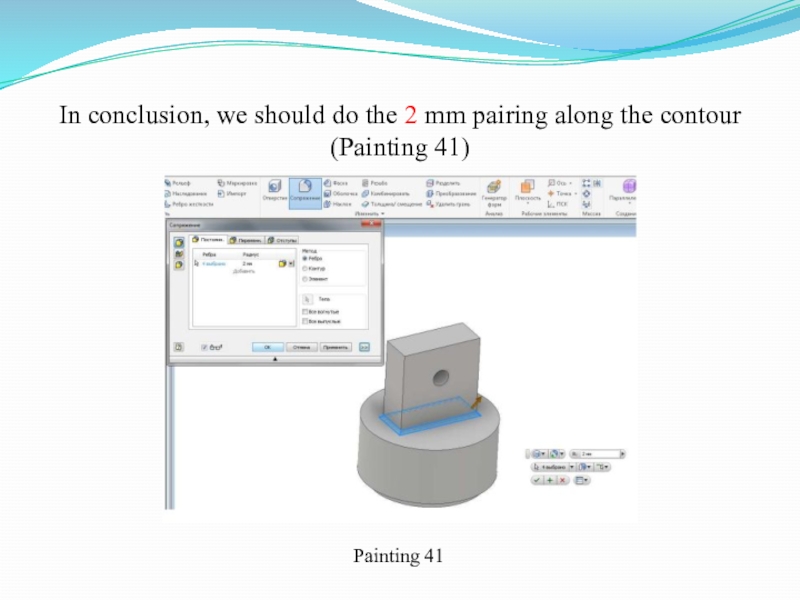
- 22. In conclusion, we should do the 2 mm pairing along the contour (Painting 41)Painting 41
- 23. And also 20 mm pairing on the top of the part (Painting 42)Painting 42
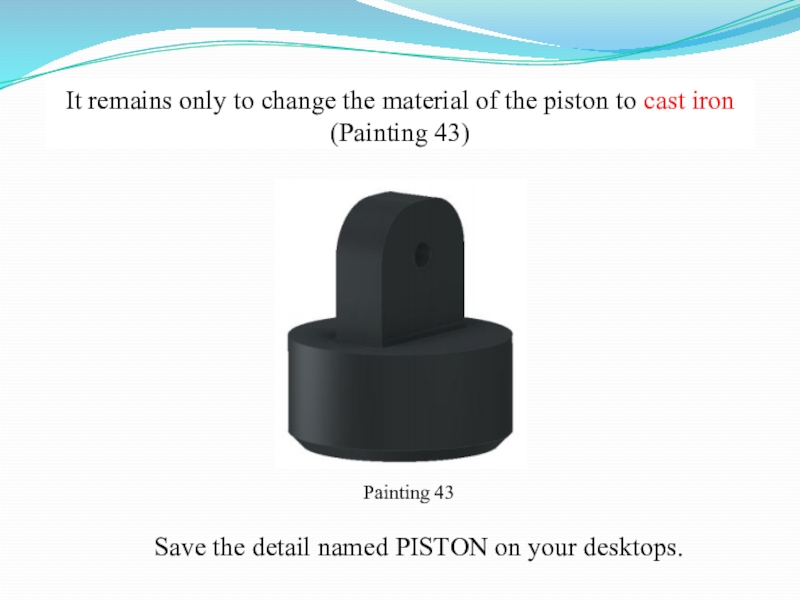
- 24. It remains only to change the material
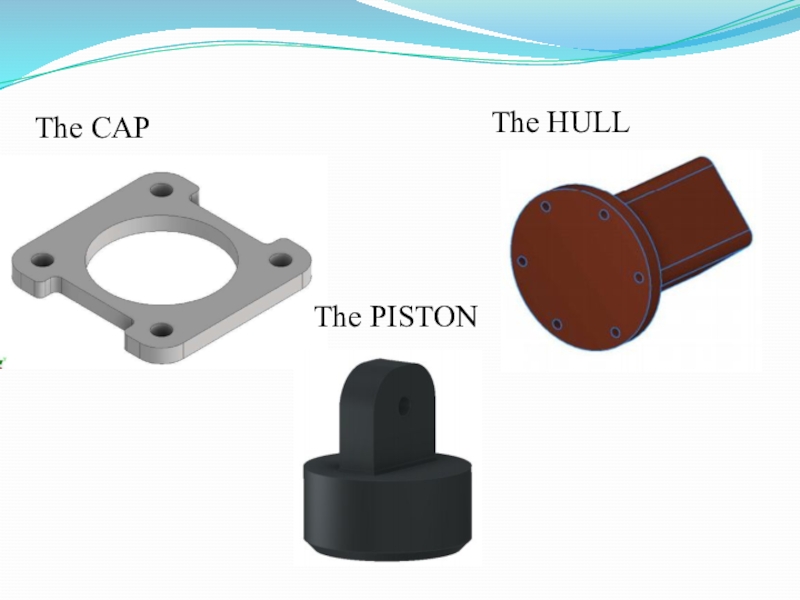
- 25. The CAPThe HULL The PISTON
Слайд 1The words of the lesson
a cap – крышка
a hull – корпус
a
a sketch - эскиз
an extrusion - экструзия, вытеснение
a combination - объединение
a cut - вырез
an intersection - пересечение
to be highlighted - быть выделенным, подсвеченным
units of measurement - единицы измерения
to create – создавать
to specify save path - указать путь сохранения
edit - редактировать
the thickness - толщина, плотность
Слайд 2The words of the lesson
a cap
a hull
a piston
a
an extrusion
a combination
a cut
an intersection
to be highlighted
units of measurement
to create
specify save path
edit
the thickness
Слайд 4First, apply the extrusion tool to the sketch.
The sketch button -
Слайд 5Specify the extrusion distance – "10". - indicate
highlighted (Painting 21). Units of measurement (millimeters) are set by default,
so you can do not specify them.
Painting 21
Слайд 7The hull
To create a hull, you need to use the file
File - Save As (specify save path) - "hull".
Слайд 8To do this, make a right-click in the browser on the
Select "Extrusion 1" in the browser, make a right-click on it, from the context menu (Painting 23) select the Edit element. In the dialog box, change the thickness to "200".
In Autodesk Inventor, you can edit parts or sketches.
Слайд 9Edit the sketch by right-clicking in the browser - Edit sketch,
Слайд 10To create the next part of the details you need to
Move the mouse cursor to the side verge of the hull - the verge will be highlighted - in the context menu (by right-clicking) select The new sketch (Painting 27).
Слайд 11Then you need to create a new sketch: circle - "200"
Слайд 12Using the command "Circular array", create 6 holes. Specify to the
Слайд 13Squeeze on 20 mm and change the hull material to copper
Save the detail named HULL on your desktops.
Слайд 14The Piston
Now create a new sketch with the keys CTR+N on
Painting 32
Слайд 17And now we are creating a new sketch on the XY
Painting 35
Слайд 19Extrude a 20 mm sketch (Painting 37) and copy it with
Painting 37
Painting 38
Слайд 24It remains only to change the material of the piston to
Painting 43
Save the detail named PISTON on your desktops.
